Blog
How to Make Natural Easter Egg Dyes at Home
April 14, 2025
Enjoy All-Natural Easter Eggs
With Easter just around the corner, the Myers Poultry team thought it would be the perfect time to share a creative, hands-on activity that will put your backyard eggs to good use—even better, this is one that the whole family can enjoy.
Did you know you can make naturally dyed Easter eggs with ingredients you probably already have in your pantry? No need for store-bought Easter egg dye kits—everyday kitchen staples like red cabbage, turmeric, and onions skins create beautiful and unique colors perfect for the holiday season.
Did you know you can make naturally dyed Easter eggs with ingredients you probably already have in your pantry? No need for store-bought Easter egg dye kits—everyday kitchen staples like red cabbage, turmeric, and onions skins create beautiful and unique colors perfect for the holiday season.
Plus, these natural dyes are kid-friendly, easily accessible, and fun to experiment with.
Whether you already have farm fresh eggs in your backyard or plan to pick up a dozen from the store, this natural egg dye recipe works with any eggs you have on hand.
Learn how to make these DIY eggs yourself to celebrate the season together as a family and create unique, personalized Easter basket displays.
Learn how to make these DIY eggs yourself to celebrate the season together as a family and create unique, personalized Easter basket displays.
How to Dye Easter Eggs the Natural Way
Before you begin, we suggest setting up a designated workspace. If you're working indoors, cover your table with a drop cloth or some old newspapers, as these dyes can get a little messy. If it’s a nice day, consider moving your setup outside for even more fun.
Kitchen Tools You'll Need:
• A large pot (to boil the eggs)
• A few heat-safe jars or deep saucepans (for the dye baths)
• A strainer
• Tongs or a slotted spoon
• White vinegar
• Cheesecloth or nylon stockings
• String or twist ties
• Paper towels or an old dish towel
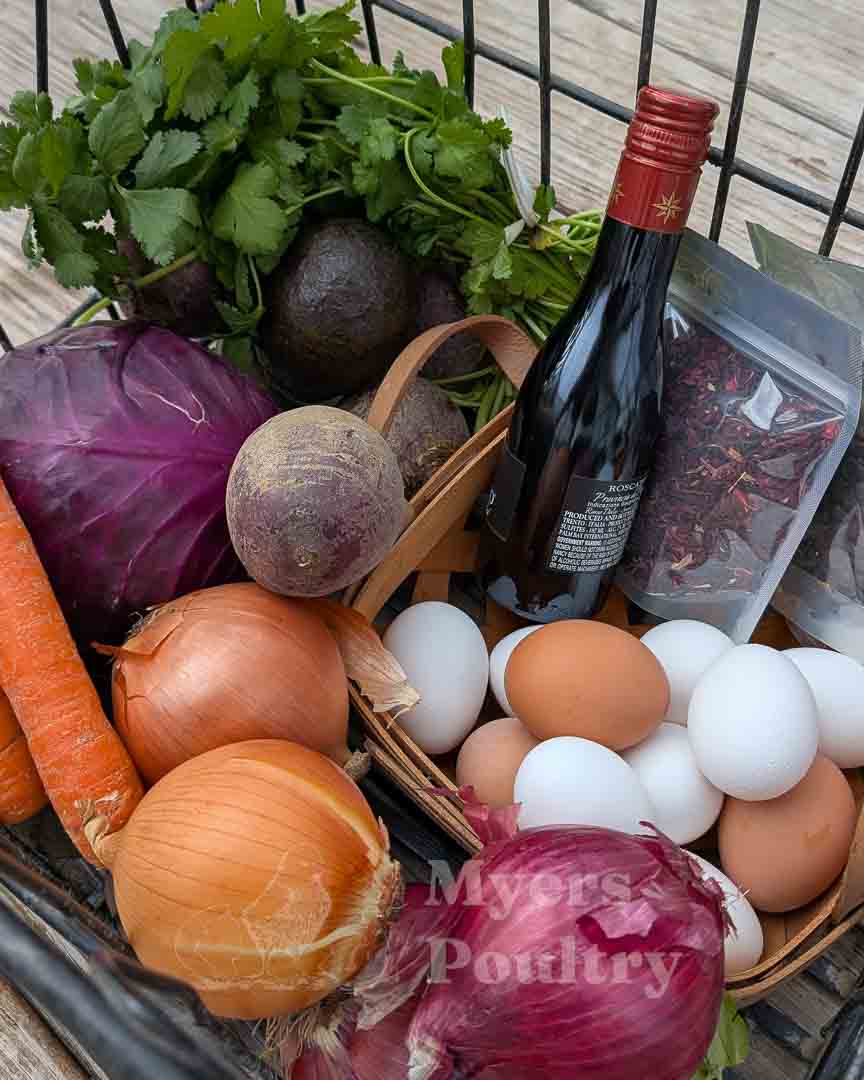 Ingredients for the Dye:
• Beets
• Beets
• Yellow onion skins
• Red onion skins
• Turmeric
• Red cabbage
• Blueberries
• Wine
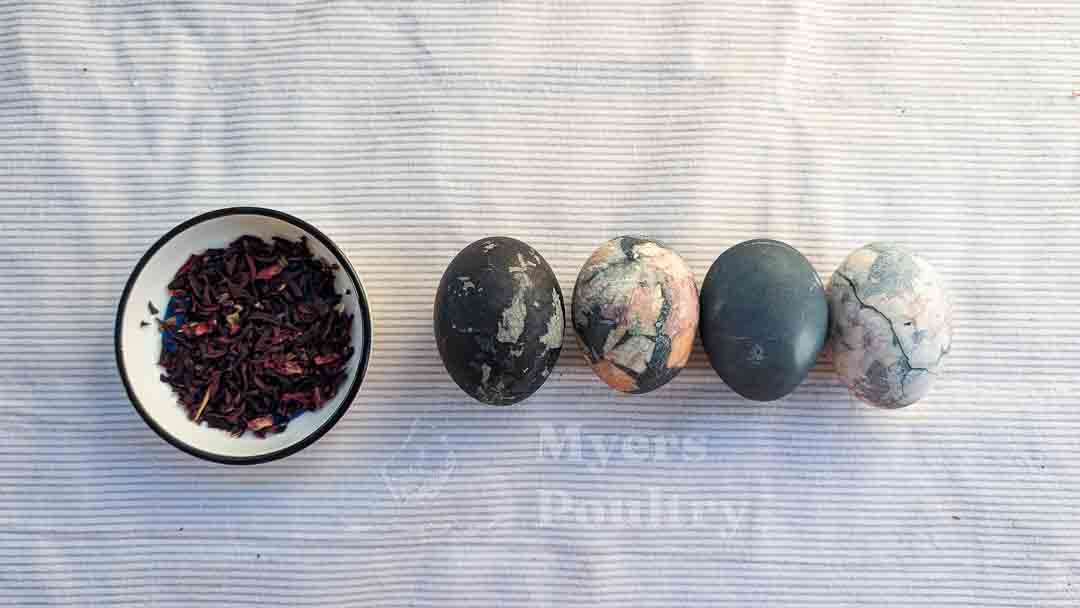
• Hibiscus tea
• Coffee
Step 1: Boil Your Farm Fresh Eggs
Start by boiling a batch of eggs to your preferred doneness. This recipe from Whole Made Living is a great easy peel method if you plan to eat your eggs after you dye them. However, you will be briefly cooking the eggs again in your hot dye liquid, so keep that in mind if you plan to use them for consumption later.
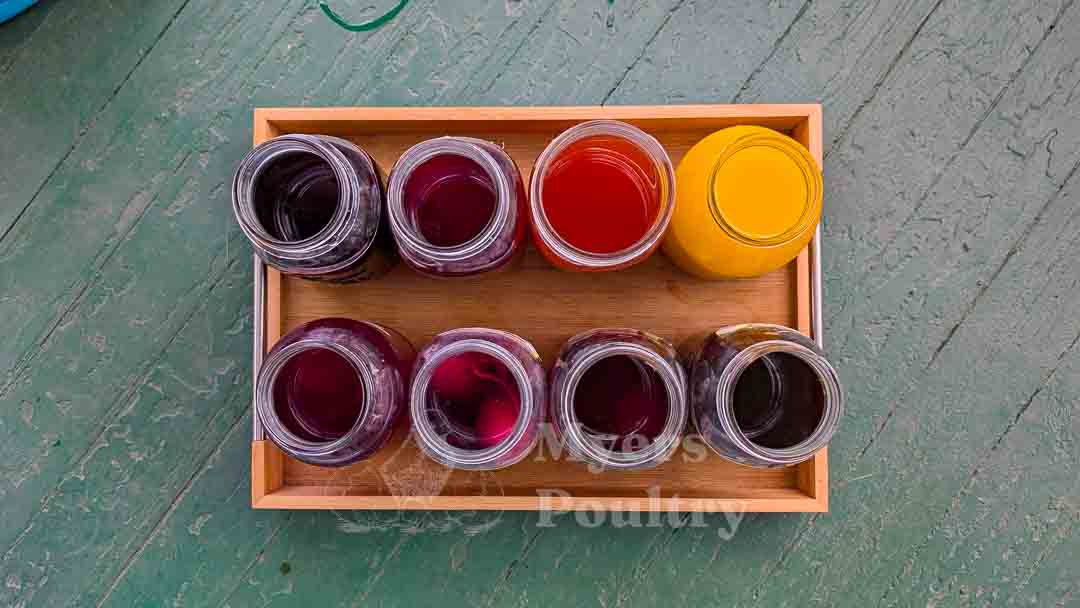
Step 2: Mix Your Dyes
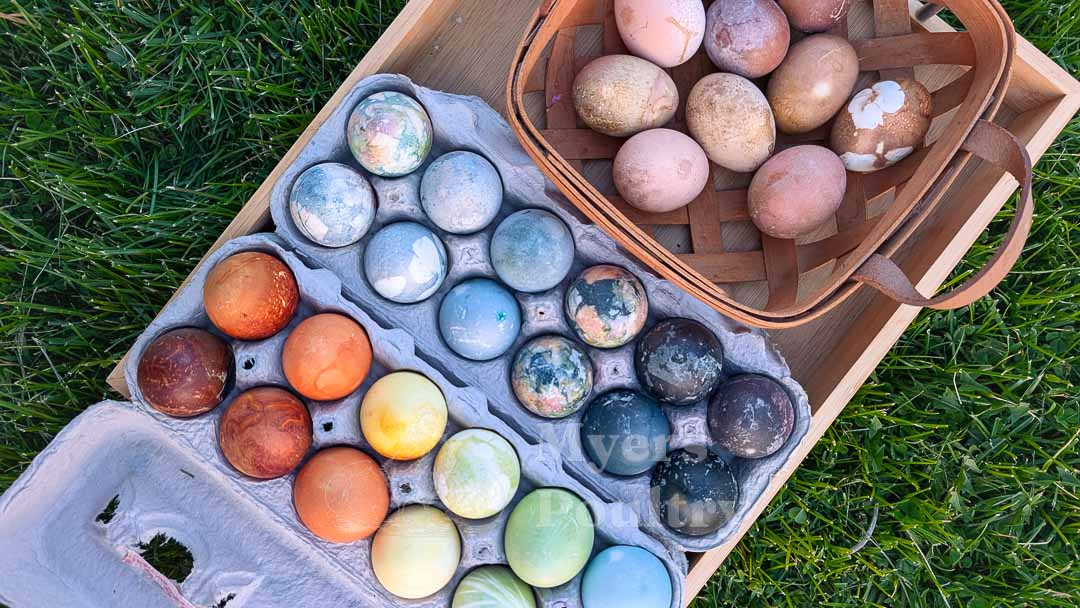
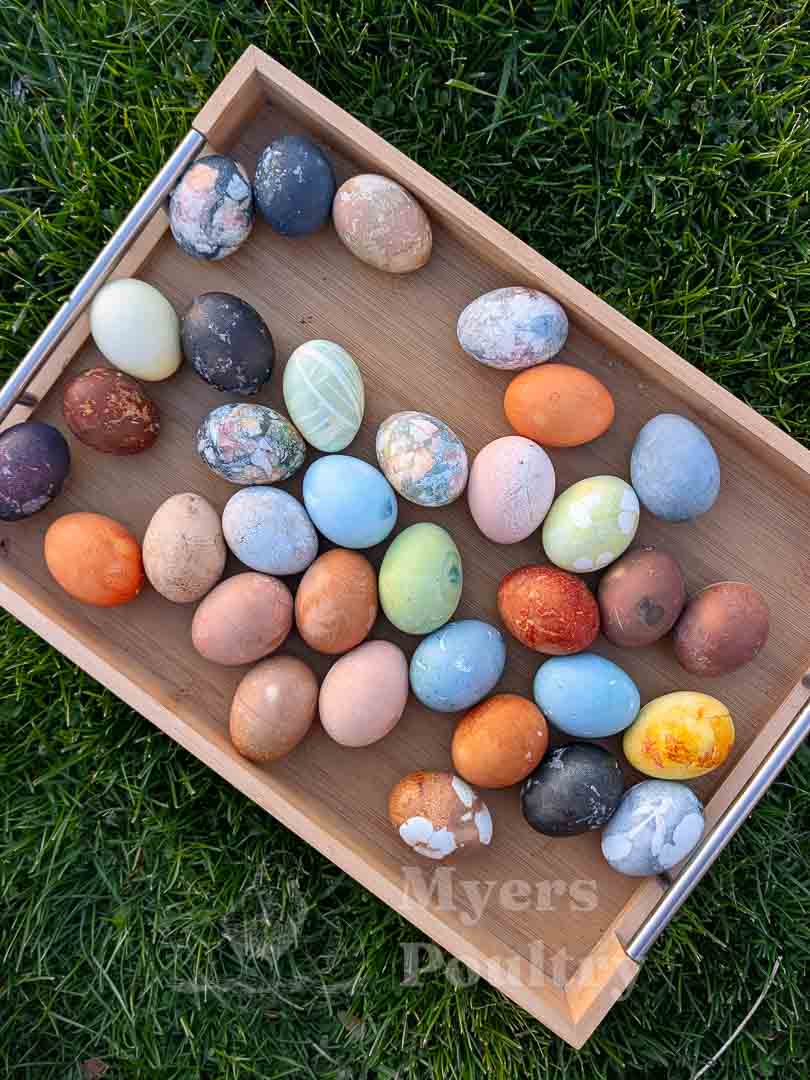
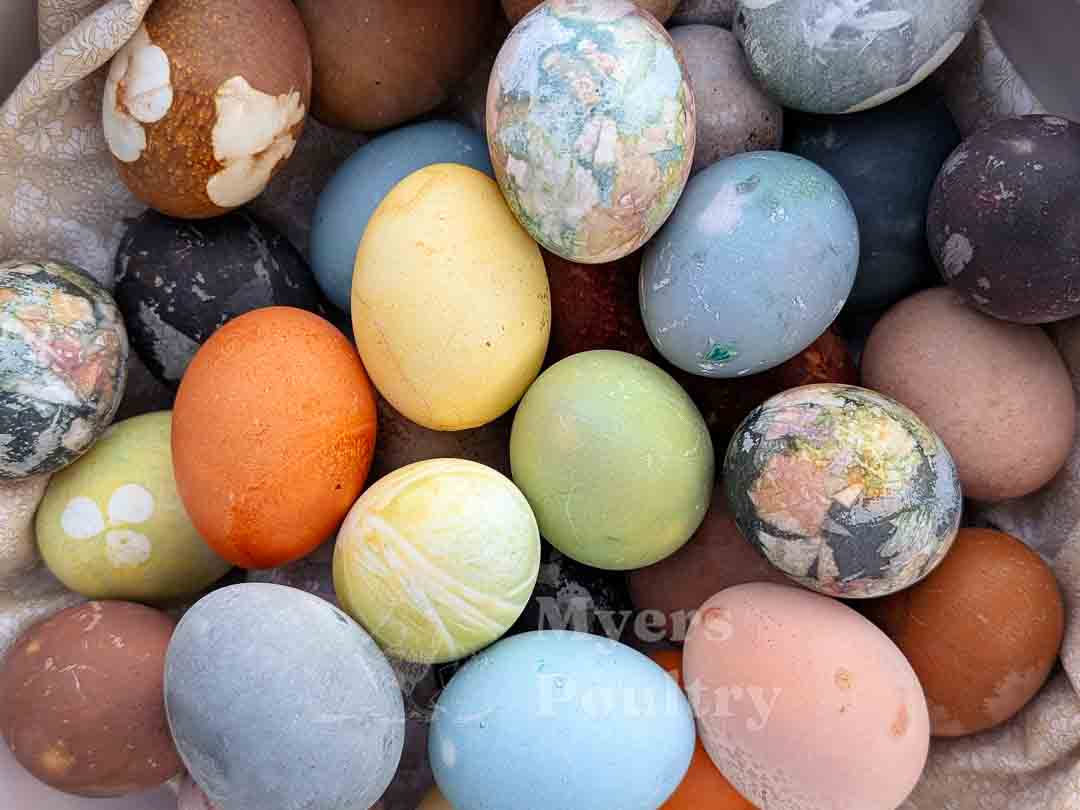
While the boiled eggs cool, you can start mixing your dye baths. While there are countless ways to achieve these colors, the following are the ingredients we used to make the eggs you see featured in this blog:
Ingredient and Color Achieved
Yellow onion skins = Orange
Turmeric = Yellow
Turmeric and red cabbage = Green
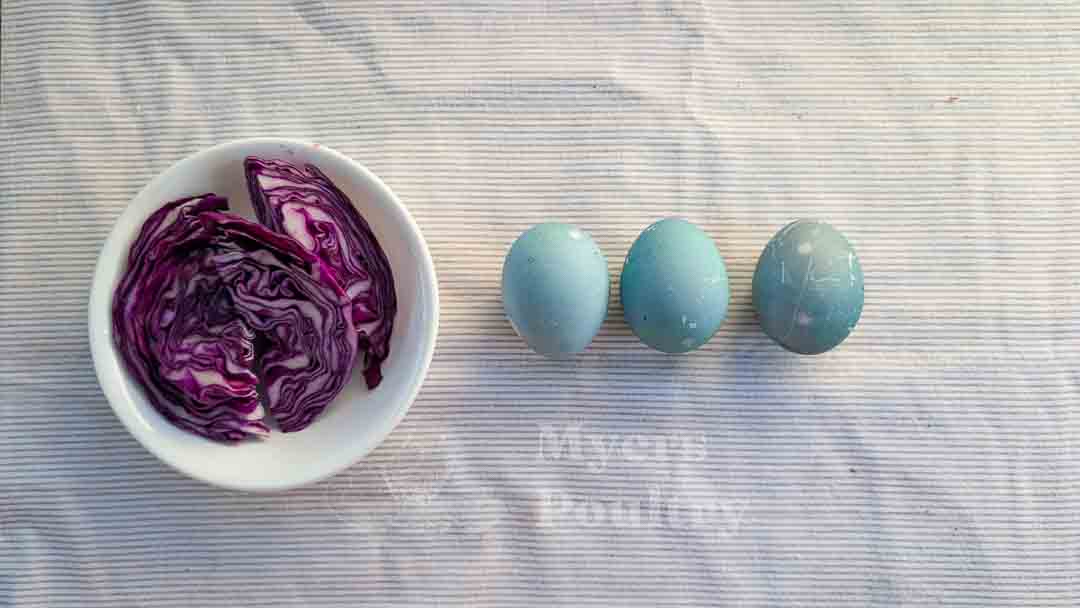
Red cabbage or hibiscus tea = Blue or a slate blue gray
Red wine = Purple
Coffee = Brown
Red onion skins = Reddish brown
There is no one-size-fits all for these dyes, and it will take some experimentation to get your preferred colors.
However, there are some basic ratios you can follow to get started. You may need to do a little tweaking to achieve your desired results.
For produce-based dyes (beets, cabbage, onion skins, etc.):
If the color is too light, you can allow the egg to continue soaking until you reach your desired shade.
The eggs will typically look quite vibrant when they first come out of the dye, but some of this dye will not fully penetrate the shell once it dries. You’ll need to wait longer to achieve more vibrant colors.
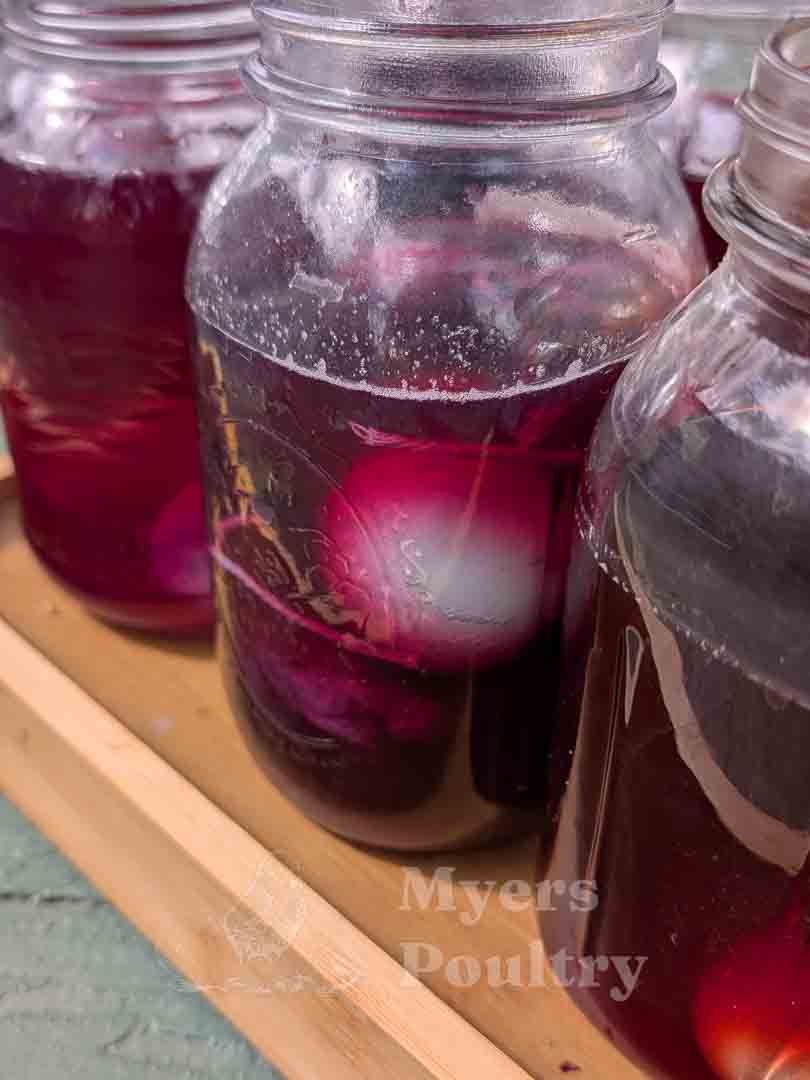
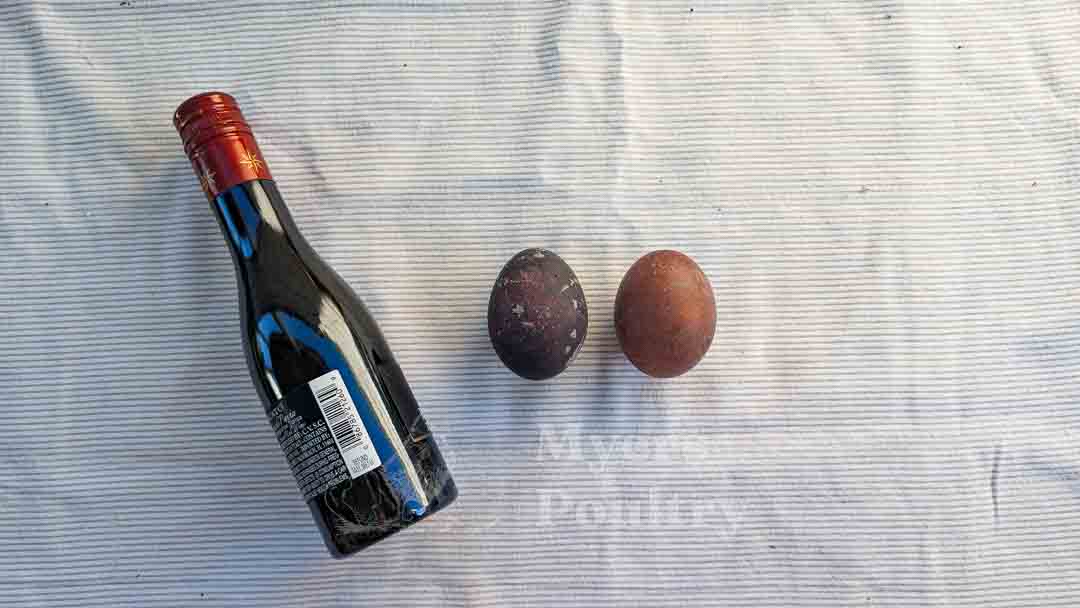
 Use a cold dip for red wine and coffee. These are naturally acidic and do not require additional heat or vinegar to transfer color. They will color your eggs beautifully overnight in the fridge.
Red wine yields a unique, glittery sheen. Our red wine eggs came out looking like they were covered in glitter. We aren't sure about the exact science behind it, but we think it may have something to do with the sugars in red wine.
Allow eggs to soak overnight for saturated, rich colors. It requires a bit more patience, but yields beautiful results. Just make sure you keep them in the fridge to prevent spoilage.
Your base egg color impacts how the dye works. Use white or cream-colored eggs for pastel shades, or experiment with colored eggs (blue, green, and brown) for richer, more complex results.
Submerge eggs fully for best results. Unless you want to try a dip dye effect (read until the end to learn more), make sure the eggs are fully submerged in your dye bath.
Let your eggs dry between layers if dipping in multiple dye baths. Otherwise, you risk muddying your colors and ending up with unintended results. The color wheel will be your friend in this scenario.
 As outlined in our Chicken Egg Colors blog, eggs are made of calcium carbonate, which is a chalky and slightly alkaline material. When you introduce vinegar to your dye, you’re changing the pH to make it more acidic.
Acidity helps break down the surface of the eggshell slightly, so the dye can penetrate the eggshell more easily. It even changes the color of some of your ingredients. For example, red cabbage changes from a purple color to a deep blue due to the acidity of the vinegar.
Because eggs are porous, your colors will be more vibrant the longer they soak, as it gives the vinegar more time to do its job.
Purple can be achieved by dipping your eggs into the beet dye first, and then into the cabbage dye once the first layer is dry.
 If you’d like to take things a step further, there are various ways you can achieve patterns and even multicolored eggs.
 Next, wrap the eggs as tightly as possible in a nylon stocking or cheesecloth and tie them with string. Place your egg into your desired pot of dye.
As outlined earlier, you can try dipping into multiple pots, but we suggest letting them dry between each dip to achieve your desired results.
However, there are some basic ratios you can follow to get started. You may need to do a little tweaking to achieve your desired results.
For produce-based dyes (beets, cabbage, onion skins, etc.):
• 2 cups water
• 2 cups chopped produce or peelings
• 1 tablespoon vinegar
• Simmer for 20–30 minutes, then strain
• Allow to cool to room temperature
For powder-based dyes (turmeric, tea):
• 4 cups water
• 3–4 tablespoons powder
• 1 tablespoon vinegar
• Simmer and stir to dissolve fully
• Allow to cool to room temperature
Red wine (no vinegar needed):
• Pour wine into a jar or saucepan
• Add eggs and refrigerate overnight
Coffee (no vinegar needed):

• Brew the coffee
• Allow to cool to room temperature
• Allow to cool to room temperature
• Add eggs and refrigerate overnight
Step 3: Dip and Dye Your Easter Eggs
Now the fun can really start. Once your eggs and dye baths have cooled down a little, gently place your eggs into the prepared solution. If you want even coverage, we recommend making sure the eggs are fully submerged in the dye.
The final color depends on how long you let the eggs soak, as well as the potency of the ingredients you used. In general, you can expect the following:
• 30 minutes to 1 hour: Light, pastel tones that are perfect for Easter.
• Several hours or overnight: Deep, saturated colors that are warm and rich.
Once you’ve achieved your desired colors, let the eggs air-dry on a rack or paper towel. Some dyes will leave a powdery residue—gently blot or wipe with a soft cloth to remove excess dye.
If the color is too light, you can allow the egg to continue soaking until you reach your desired shade.
The eggs will typically look quite vibrant when they first come out of the dye, but some of this dye will not fully penetrate the shell once it dries. You’ll need to wait longer to achieve more vibrant colors.
Helpful Tips and Reminders
Red wine yields a unique, glittery sheen. Our red wine eggs came out looking like they were covered in glitter. We aren't sure about the exact science behind it, but we think it may have something to do with the sugars in red wine.
Allow eggs to soak overnight for saturated, rich colors. It requires a bit more patience, but yields beautiful results. Just make sure you keep them in the fridge to prevent spoilage.
Your base egg color impacts how the dye works. Use white or cream-colored eggs for pastel shades, or experiment with colored eggs (blue, green, and brown) for richer, more complex results.
Submerge eggs fully for best results. Unless you want to try a dip dye effect (read until the end to learn more), make sure the eggs are fully submerged in your dye bath.
Let your eggs dry between layers if dipping in multiple dye baths. Otherwise, you risk muddying your colors and ending up with unintended results. The color wheel will be your friend in this scenario.
The Important Role of Vinegar in Naturally Dyeing Eggs
Acidity helps break down the surface of the eggshell slightly, so the dye can penetrate the eggshell more easily. It even changes the color of some of your ingredients. For example, red cabbage changes from a purple color to a deep blue due to the acidity of the vinegar.
Because eggs are porous, your colors will be more vibrant the longer they soak, as it gives the vinegar more time to do its job.
Using Color Theory to Achieve Your Desired Shades
As you start to experiment with your eggs, you'll quickly realize that this is more than just a fun craft—it's a great lesson in color theory. Knowing the basics will help you achieve certain results more easily.

We suggest printing out a color wheel to give you a visual guide on how primary and secondary colors interact with each other.
Combining certain colors can lead to unexpected results.
Combining certain colors can lead to unexpected results.
The primary colors are:
Red
Yellow
Blue
All of these colors can be mixed together to achieve the secondary colors, which are:
Orange (Red and Yellow)
Green (Blue and Yellow)
Purple (Blue and Red)
Using different strengths and dip times for certain colors can help you achieve beautiful variations in your colors.
To achieve a vivid orange color, use a large amount of turmeric in your yellow dye bath. Dip your eggs into the yellow first, and allow to dry fully. Then, do a second dip into your beet or onion skin dye.
A teal blue can be achieved by soaking your eggs for a few hours in a turmeric dye to create yellow. Once dry, dip again briefly into the red cabbage dye, which yields a blue color. Keeping the egg in cabbage dye for longer will turn it into a teal or turquoise color.
Purple can be achieved by dipping your eggs into the beet dye first, and then into the cabbage dye once the first layer is dry.
It's also helpful to know your complementary colors, which sit directly across from each other on the color wheel:
Blue and Orange
Red and Green
Purple and Yellow
When mixed together, complementary colors cancel each other out and create a neutral color.
Keep this in mind during your experimentation, as your colors will quickly become muddy and gray if you combine complementary colors, or don't wait long enough for your eggs to dry between layers.
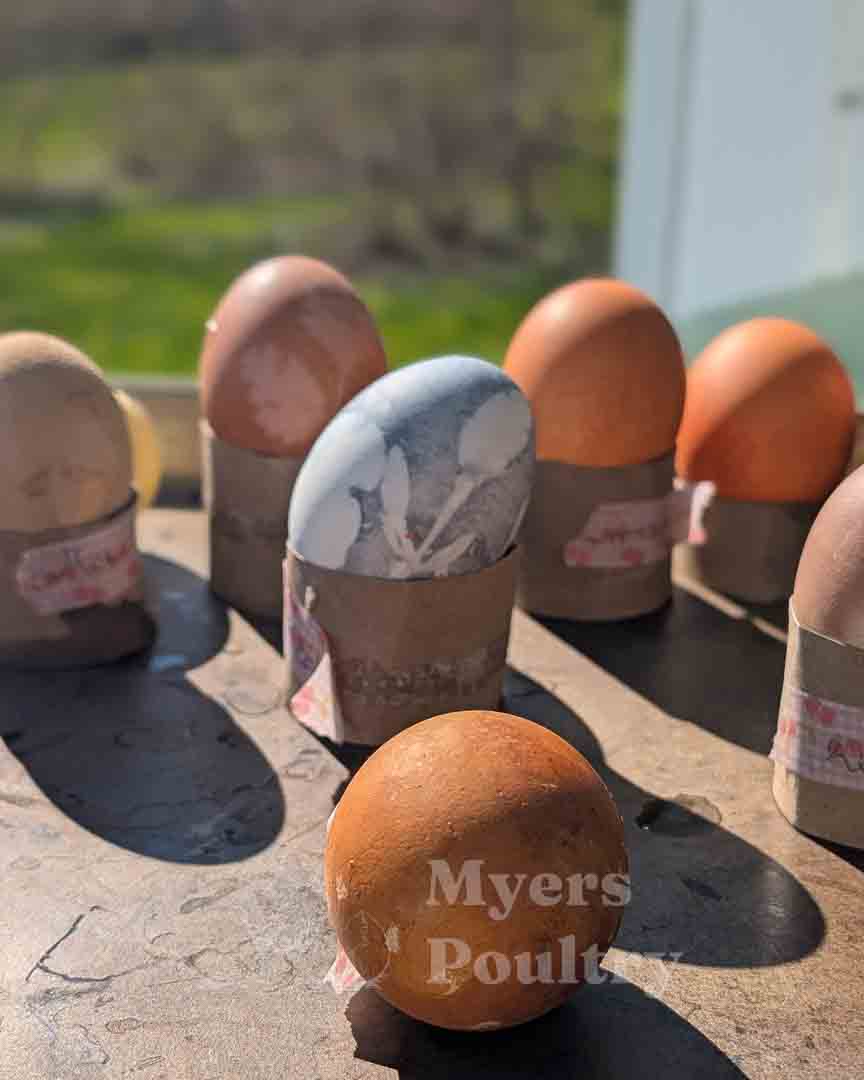
How to Make Patterns on Easter Eggs
These were by far our favorite eggs to create.
Supplies:
• Cheesecloth or nylon stockings
• Fresh herbs, flowers, or leaves
• String or twist ties
• Water for wetting the eggs
• Prepared dye baths
• Boiled eggs
Directions for Easter Egg Patterns
First, send your kids out to the backyard to collect as many flowers and leaves as they can find. This is arguably one of the most fun parts, as it’s basically another version of an Easter egg hunt!
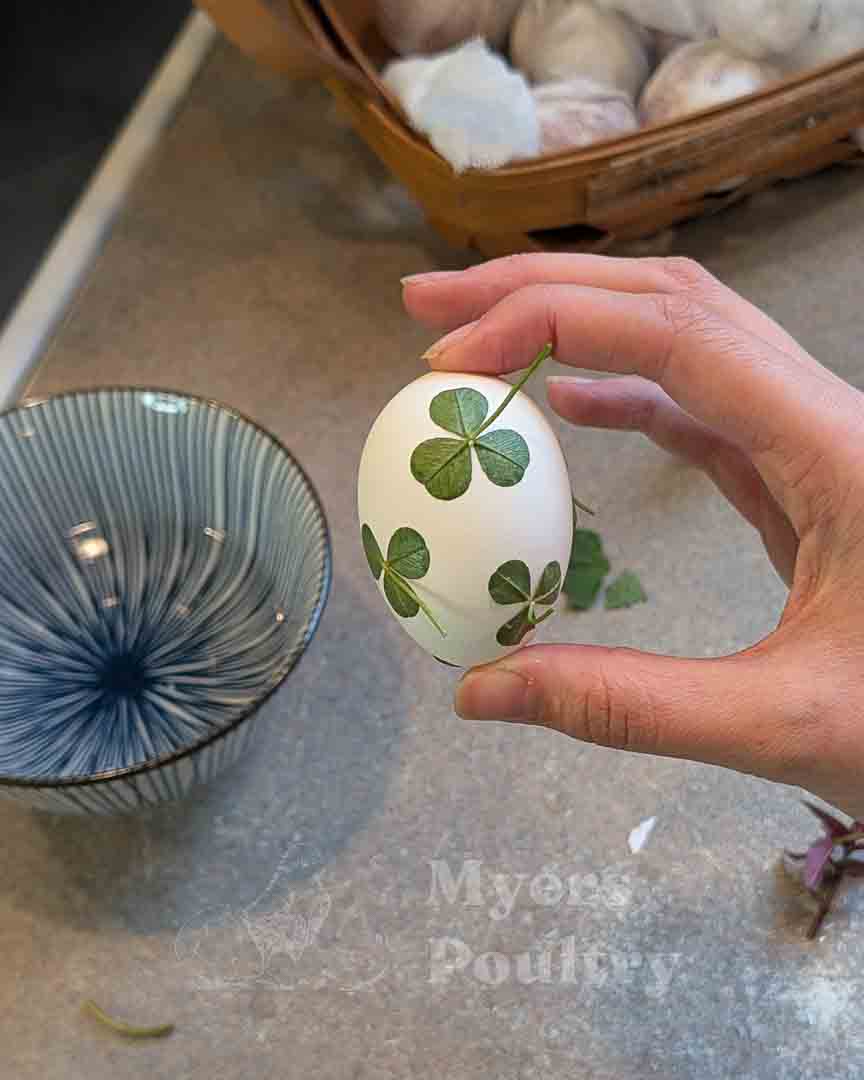
We recommend things like clover, herbs, and poppies. These items are usually fairly flexible and will lie flat against the egg. You only need small sprigs to create a stencil.
Once you have gathered a selection of flowers and herbs, wet the eggs to hold your foliage in place.
As outlined earlier, you can try dipping into multiple pots, but we suggest letting them dry between each dip to achieve your desired results.
To achieve the marbled pattern effect we got with these eggs, you can wet your eggs and roll them around in onion skins.
If you want a multicolored look, be sure to use red and yellow skins together.
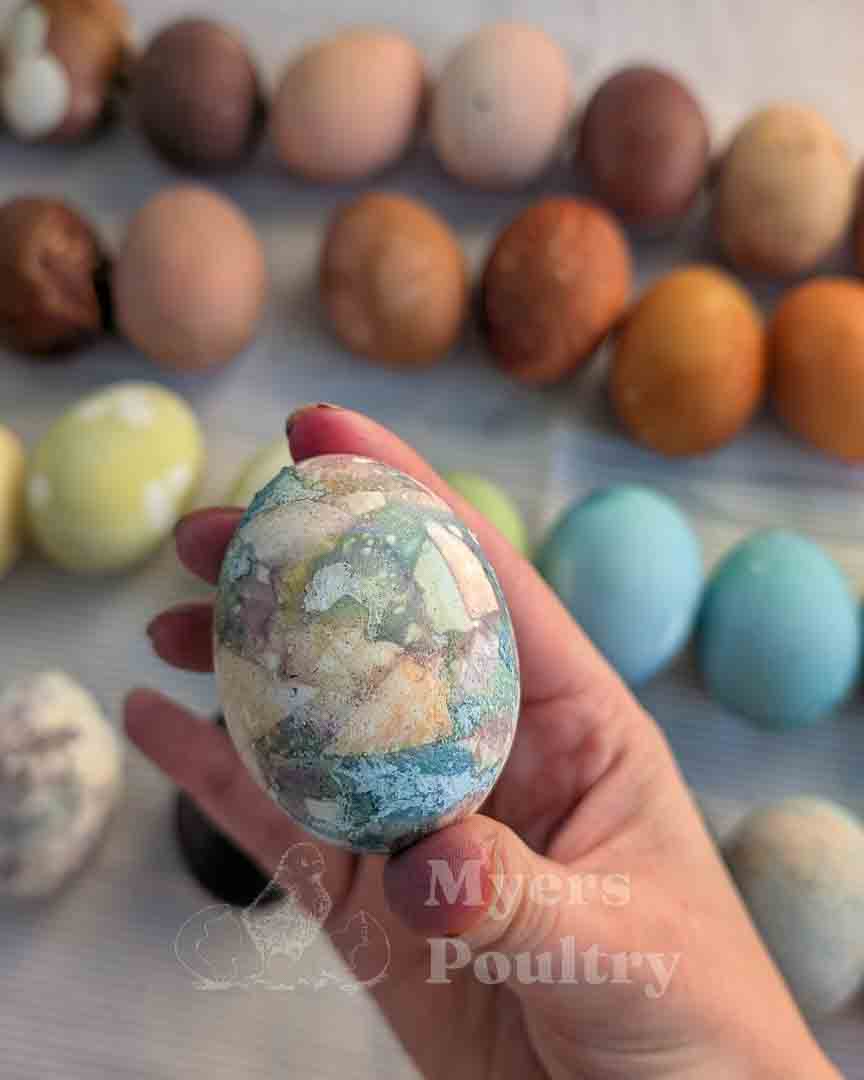 Once the eggs are fully covered with onion skins, wrap them up tightly and place into your dye bath.
Our favorite onion skin eggs were dipped in blueberry dye.
If you want a multicolored look, be sure to use red and yellow skins together.
Our favorite onion skin eggs were dipped in blueberry dye.
For a two toned or tie dye look, you can partially submerge your egg in one color, then dip It halfway into another dye, letting them dry in-between each dipping.
Repeat multiple times until you get the desired effect.
Repeat multiple times until you get the desired effect.
Enjoying Natural Easter Egg Dye with Eggs from Myers Poultry
There’s no right or wrong way to dye eggs—all you need is creativity and a willingness to get a little messy. And if you have high-production egg layers sourced from Myers Poultry, then you probably have more than enough eggs to get started.
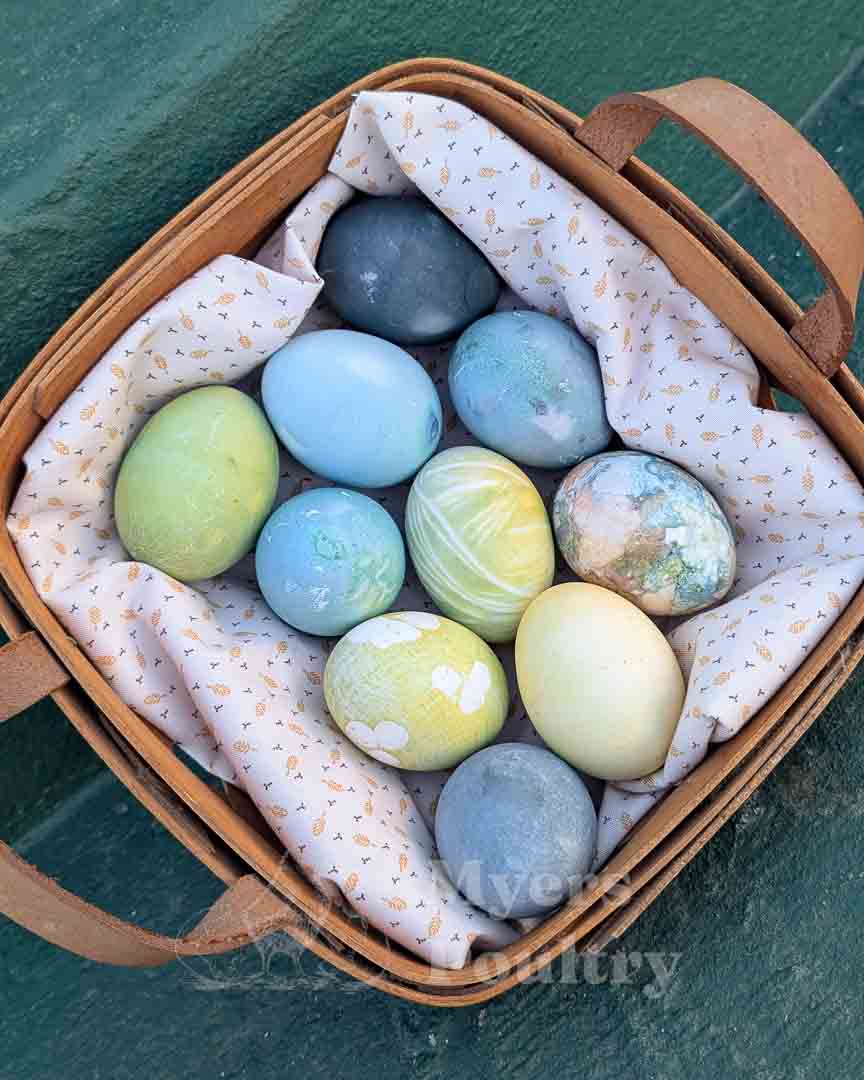
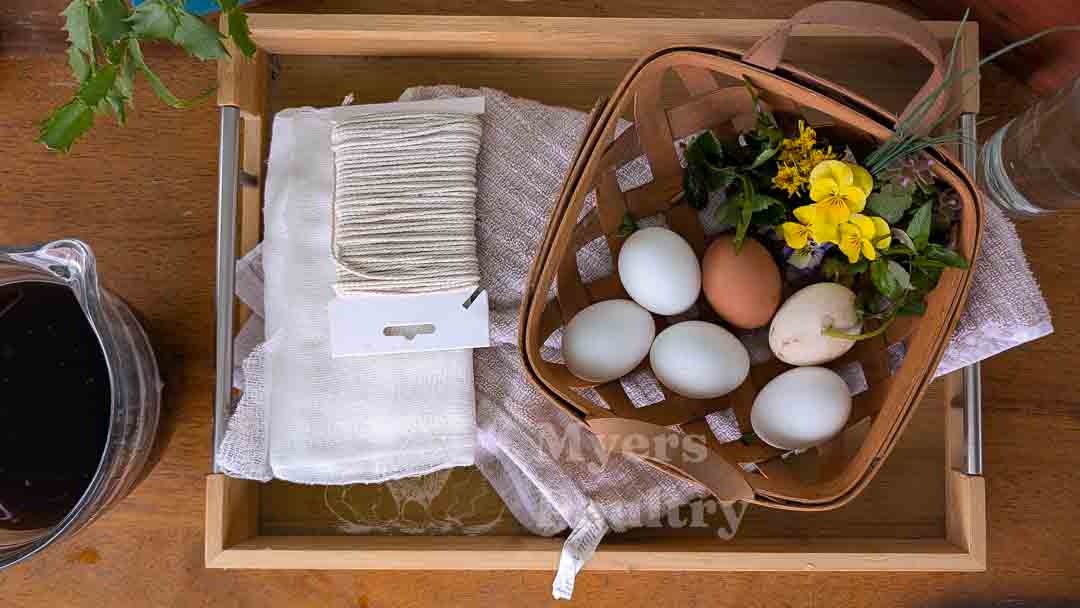
And while these eggs are sure to make your Easter basket look extra beautiful this year, we lined our baskets with fabric purchased locally from a great shop in Bedford, PA for an extra touch of holiday magic.
To stay with the all-natural theme, these fabrics are a great alternative to the plastic lining you often find in grocery stores.
From all of us at Myers Poultry, we hope this activity brings a little extra joy to your Easter celebration and even inspires a new tradition.